Thanks for all the “water bird” suggestions you shared with me this week. I was inspired to create enough blocks to put together a lap quilt.
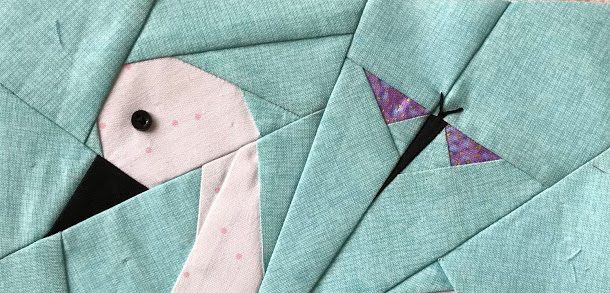
 This Flamingo will measure 8″ wide by 16 1/2″ high, unfinished. I decided not to limit myself to just birds from the northwoods of Wisconsin. Since I adore flamingos, I had to include 1 in my collection of water birds.
 This Heron also measures 8″ wide by 16 1/2″ high, unfinished. I like to have an assortment of block sizes, not all square.
 The Pelican measures 8″x 8″ square. We actually get pelicans in Oshkosh during the summer!
 Here’s my mock up for the lap quilt. I plan to use a 1 1/2″ wide sashing, but not sure what color fabric to use. Actually, the white isn’t too bad…any suggestions? Do you think I should limit this quilt to ONLY water birds from Wisconsin? I love getting your input 🙂
Linking with:
Confessions Of A Fabric Addict
Quilting Is More Fun Than Housework