Hi! I’m Mary Hertel. Welcome to my newest book “HOME SWEET HOME Paper Piecing“. Featuring 17 of my favorite block patterns, and 7 charming projects, this book is guaranteed to provide hours of creative fun for you.
If you are new to paper piecing, you can rely on any of my books to provide step by step directions. To give you even more assistance, visit me at madebymarney.com to watch paper piecing tutorials.
Did you know that as you paper piece, the block is created on the back of the paper pattern, and will be the opposite of the pattern? On the pattern, this sweet gnome’s flower is actually pictured on the left, but in the finished block it will be on the right.
With gnomes from spring, summer, fall, and winter, this table runner can be used all year long. The book has lots of great gift ideas. Why not start sewing those Christmas gifts right now?
Totes, floor pillows, wall hangings, pillowcases and more. Sounds like fun, doesn’t it?
And remember, all 17 blocks can be used in any of my other 6 books. What a great way to show your creativity!
Please visit me at www.madebymarney.com for more paper piecing ideas.
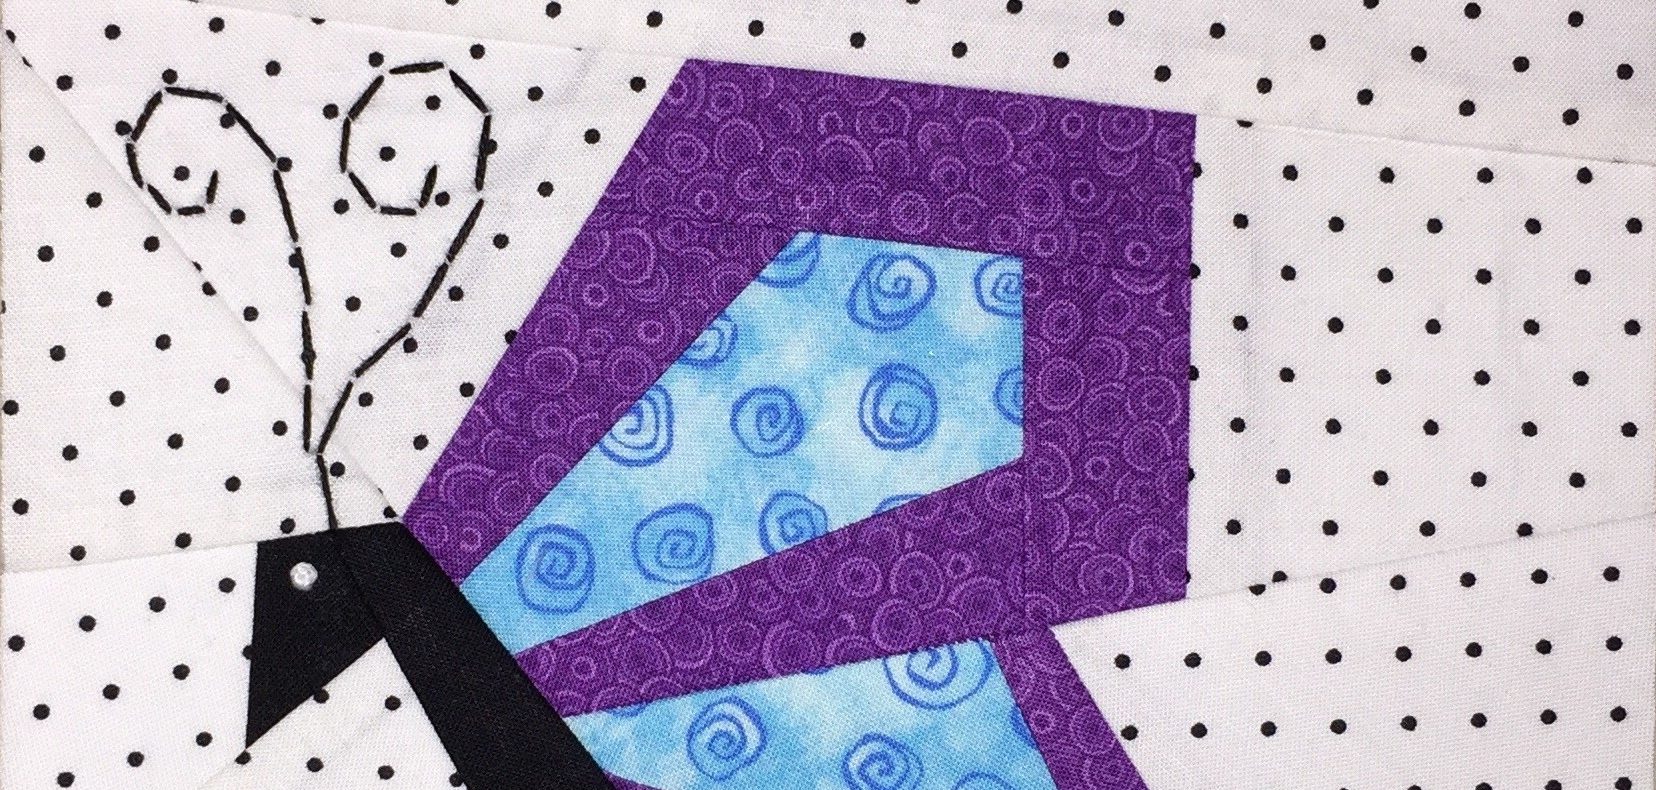
Welcome summer! These BREEZY BUTTERFLIES are just right for some warm weather paper piecing.
BREEZY BUTTERFLY 1BREEZY BUTTERFLY 2
These patterns are easy enough for beginners, but fun for intermediate paper piecers, too. If you are new to paper piecing, watch some of my free tutorials on my “Video and Tutorials” page.
Please consider subscribing so you can download the FREE BUTTERFLY PATTERNS HERE:
[download id="3048"]
FREE DOWNLOAD
Send download link to:
After subscribing, the Butterfly downloads will be sent directly to your email.
Starting September 3, you can HOP along with our Row Along. Each day designers will be giving FREE patterns for rows that could be used in quilts, table runners, place mats, etc. Each row correlates to a story or fairy tale.
Click to see lots more GIVE-AWAYS. And, hang with me til the end of this post for my Give-Away. Please visit Seams to be Sew to read the rules for our Give-aways.
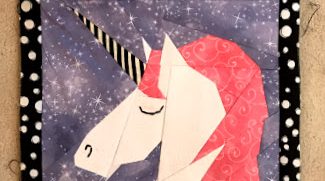
My row is vertical and measures 9″x18″ finished. I was motivated by “The Last Unicorn“, written by Peter Beagle.
DREAM BIG, from Made By Marney
This is a paper pieced pattern and may be purchased here: CLICK HERE TO PURCHASE.
Here’s a clever idea to use this row in a super cute PILLOWCASE. Here is a tutorial to sew your own Dream Big Unicorn Pillowcase. OR, scroll to the end to see my GIVE-AWAY.
Dream Big Unicorn Pillowcase
Where better to DREAM BIG than on your pillowcase, right? NORTHCOTT fabrics have been wonderfully generous in suppling us with fabric for our samples. I am using Northcott White 22 136-10 for my main pillowcase fabric, and scraps for the paper piecing. I use French seams and line the back of the paper pieced part of the pillowcase so there are no exposed seams, as this is an item that will be washed repeatedly. Finished size: 20 1/2″x 28″, fits a standard sized pillow.
Cut these pieces from 1 yard of the main fabric:
2 rectangles 2″x 9 1/2″
1rectangle 7″x 21″
1 rectangle 9″x 21″
2 rectangles 21″x 25″
From 1/3 yard of contrasting color cut:
1 strip 10″ x WOF (width of fabric)
From 1/3 yard of fusible fleece cut:
1 rectangle 9 1/2″x 21 1/2″
Sew the 2″x 9 1/2″ strips to the top and bottom of the paper pieced unicorn.
Remove the paper from the back of the unicorn. Steam press the fusible fleece to the wrong side of the unicorn unit. Quilt as desired (there will only be 2 layers to quilt through instead of the usual 3 layers of fabric).
Use 7″x 21″ fabric.
Pin the 7″x 21″ piece of main fabric to the unicorn unit, with right sides together.
Lining piece.
Trim 1 of the 21″x 25″ pieces of fabric to 11″x 21″. This will be the lining, although I am using the main fabric so as not to waste fabric. Pin this piece over the 7″x 21″ piece, right side of fabric facing down. Stitch through all 3 layers, using a 1/4″ seam allowance.
Press open.
Press the fabric to the right of the unicorn and the seam allowance towards the unicorn.
This is the back view.
Press only the LINING piece over the back of the unicorn.
Turn under excess and press.
Turn under any fabric that extends past the unicorn, and press under to form a hem. You may trim the excess to 1/2″ if preferred. The hem should be even with the raw edge of the unicorn.
Push the lining aside when attaching the left portion of the pillowcase top.
Pin the 9″x 21″ piece of main fabric to the left side edge of the unicorn unit. Sew in place using a 1/4″ seam allowance. Press the fabric open. Press the seam towards the unicorn.
Pin lining in place.
Pin the hem edge of the lining over the seam allowance and pin in place.
This is the back of the pillowcase.
Hand stitch the hem in place. The front of the pillowcase is now finished.
Assemble the pillowcase using French seams. Pin the 21″x 25″ piece of main fabric to the back of the pillowcase, wrong sides together. Sew together using a scant 1/8″ seam allowance.
Turn the pillowcase with the right sides together, press, and sew the same seam again, using a 14″ seam allowance. This encases the previous seam.
Add the Cuff.
Press the 10″x WOF strip AND the pillowcase open flat. Pin the right side of cuff fabric along the 42″ edge of the pillowcase, right side of cuff facing wrong side of pillowcase. Notice how I am skipping the SELVAGE part of the cuff. It will be trimmed later.
Burrito cuff pillowcase.
Ross the pillowcase into a tube that will fit inside of the cuff fabric.
Roll the cuff fabric up and over the pillowcase tube and pin in place.
Here you see how I am matching the edges of cuff fabric and pillowcase fabric and pinning in place. Sew through all layers with a 1/4″ seam allowance.
Pull the pillowcase out of the tube through one of the side edge holes.
Press cuff flat and trim away any excess cuff from both sides of the pillowcase. Now finish sewing the pillowcase together using French seams.
Fold the pillowcase in half, with the right side out and pin the two remaining sides together. Sew a scant 1/8″ seam allowance on these two sides. Turn inside out and press.
Pin the same two edges with the RIGHT SIDES TOGETHER, and sew a 1/4″ seam allowance, encasing the previous seam.
Turn right side out and press flat. How sweet is that? This pillowcase is ready for some BIG dreams!
GIVE-AWAY: Click HERE for the chance to win this Northcott Fat Quarter Bundle, a $20 value.
Now for MY GIVEAWAY. Click to enter to win a FREE paper piece and appliqued pattern to create this super cute UNICORN LAP QUILT. Alphabet letters are included to applique a personalized name on this project, if so desired. This adorable pattern is also available on my Etsy shop. Don’t forget to leave a comment!
=========================================================== Tuesday, October 08, 2019 – SNT
Beth Strand Carol Andrews Carol Swift Cindy Pieters Debra Davis Dione Gardner-Stephen Elizabeth Coughlin Linda Bratten Lydia Midday Marian Pena Nancy Myers Pamela Boatright Paula Gilmore Ursula Prandtstetter
It’s here! My newest paper piecing book, Sew Cute and Clever Farm and Forest Friends (longest title ever, right???) has arrived fresh from the printers. And, as advertised, it is as cute as can be!
Oooops…bad hair day! Oh well, who needs great hair when they are sewing…
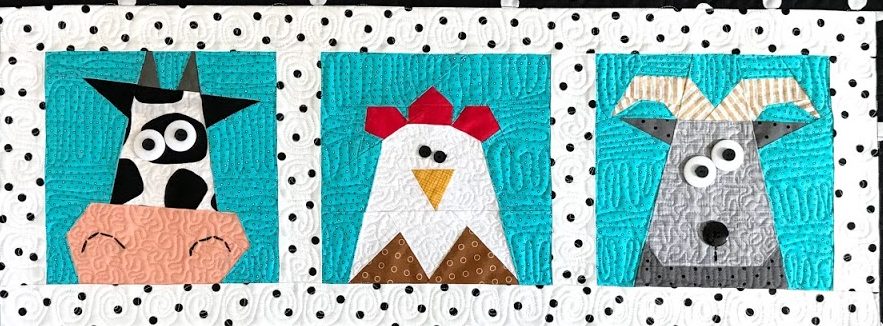
This book contains 16 whimsical paper pieced animal blocks AND 6 projects for your home decorating needs.
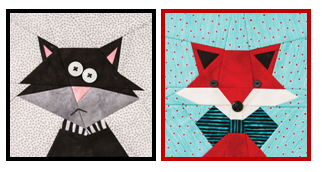
As you can see, these blocks were designed with simplicity in mind. They are EASY PEASY! This FOX is cute as can be, and here are a few more that are not pictured on the cover of the book.
This quizzical OWL is ready for a pillow or potholder, don’t you think?
This adorable PUPPY PILLOWCASE was designed with a special little boy in mind!
I especially love this octagonal table runner. Any 4 blocks work because all the blocks and projects are interchangeable.
The BENCH PILLOW can also be made into a TABLE RUNNER, like this one. This runner reminds me of growing up on the farm…
I am loving this fun and colorful book and so will you! With step by step paper piecing directions included, you will be piecing like a pro in no time.
Find this book, and all of my books and patterns on ETSY.
Watch for 12 Days of Christmas in July Blog Hop starting this Saturday, July 14. Many thanks to Sarah Craig at Confessions Of A Fabric Addict. She has spent countless hours organizing this fun filled event. Visit Sarah for the entire schedule on Saturday, July 14.
Christmas is my favorite holiday for designing. I have created many different paper pieced Santas, but on Tuesday I will be sharing a tutorial on how to paper piece my favorite Santa pattern. Visit each of these 29 designers between July 14-29.
Each designer is offering something fun and exciting for Christmas… perhaps a free tutorial or a pattern. AND…some of us will also be offering GIVE-AWAYS.
I will be giving away 1 free copy of my latest paper piecing book, Sew Yourself A Merry Little Christmas. This book offers 16 adorable paper pieced blocks AND 8 cute holiday projects to use the blocks.
This Polar Bear table topper and gift sack are both included in the book, along with so much more.
Join the fun! My day to post is Tuesday, July 17. I will be including a full schedule on Tuesday. See you then!
Welcome to my paper piecing tutorial “#2: Sewing Segments Together”. My step by step directions are designed to help you use my “Made By Marney” paper pieced patterns.If you are piecing a combination block, you will have to paper piece each segment in the pattern, then sew these segments together. Watch “Tutorial #1: Paper Piecing a Segment” if you are a beginner before watching this tutorial.
The Penguin block I am using in this tutorial is a FREE download and will be available on my website starting on Tuesday, February 6.
Step 4: Bend the paper pattern out of the way and trim away any excess seam allowance beyond the 1/4″ needed.
Step 5: Flip fabric 2 in place behind piece #2 and press flat.
Step 6: Trim away the excess fabric, leaving a generous 1/2″ beyond what is needed.
Step 7: Position the fabric for piece #3. Again, I am bending the pattern on the stitching line so I can peek under the pattern to help place my fabric to allow about 1/2″ of seam allowance. (I am always generous with this seam allowance, especially for beginners.)
Above, you can see that piece #3 is stitched, pressed in place, and the excess fabric has been trimmed. Continue to add pieces in numerical order.
Above you can see that section C is now completed.
Trim the seam allowance 1/4″ from the red line. Segment C will be sewn to Segments A and B along the red lines.
Step 8: This a close up showing how I match the seam lines for segments A and B. Poke a straight pin through the seam line of segment A and match it with the seam line on segment B.
Pin the segments together. Sew on the seam line.
Rip off the paper that is in the seam allowance on each side.
Press the seam to one side. Here is segment A and B sewn together and pressed.
If you need any further assistance, contact me at maryannhertel@gmail.com
My step by step directions are designed to help you use my “Made By Marney” paper pieced patterns. Tutorial #1 gets you started on paper piecing a segment. I cannot fit all of the photos in one post, so Tutorial #2 shows how to finish the segment and sew it to a second segment. The pattern I am using can be found as a FREE download on this website starting Tuesday, February 6.
Let’s do a tutorial on paper piecing right now. Set the stitch length on your sewing machine to 1.5 (that’s about 20 stitches per inch).
Step 1 : Make 3 copies of the original pattern. (I use cheap copy paper.) Cut it into the 3 segments A, B and C, shown by the red lines. I like to add 1/4″ seam allowances between the segments. This is not a necessary step, but I find it a helpful reminder as I paper piece. If you prefer, you could just make 1 copy of the pattern and cut it apart on the red lines. Just make sure you are allowing plenty of fabric along the edges for the 1/4″ seam allowance as you paper piece. I will be paper piecing Segment C.
Step 2: Pin a scrap of fabric behind piece #1. Hold the pattern up to a light source so you can position the piece behind piece #1 on the pattern. The right side of the fabric is facing away from the back of the pattern. Note that the scrap is larger than piece #1 to allow for seam allowances.
Step 3: I am now ready to position the fabric for piece #2. In the first photo I am pointing at the
line I will be stitching. In the second photo I am bending piece 2 back along the stitching line to help me position the fabric. Note that the fabrics are right sides together. I am allowing for about a 1/2″ of fabric beyond the stitching line. You can see I am working with a large scrap for fabric 2. I like to trim my fabric AFTER stitching it in place.
Notice, I start sewing 1/4″ before my stitching line, and will stop stitching 1/4″ after my stitching line. No backtacking is necessary.
Step 4: Bend the paper pattern out of the way and trim away any excess seam allowance beyond the 1/4″ needed.