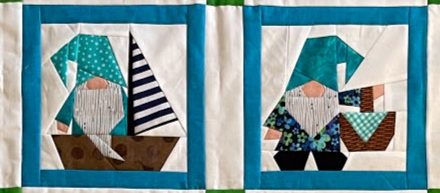
This adorable lap quilt was designed while I was vacationing in Hilton Head. I found the fabric in a super cute fabric store on the island.
I had a blast shopping for fabric that would work for the cute little “Hawaiian” shirts.
This Gnome has a unicorn floatie and sunglasses! He is ready for the beach.
This Gnome in his sailboat is definitely going on a pillow for my boyfriend, who adores sailing!
Playing in the sand…too cute!
When I discovered the fabric for this little shirt, with the tiny pink flamingos and palm trees, I went nuts! Do all of you enjoy discovering those special fabrics as much as I do?
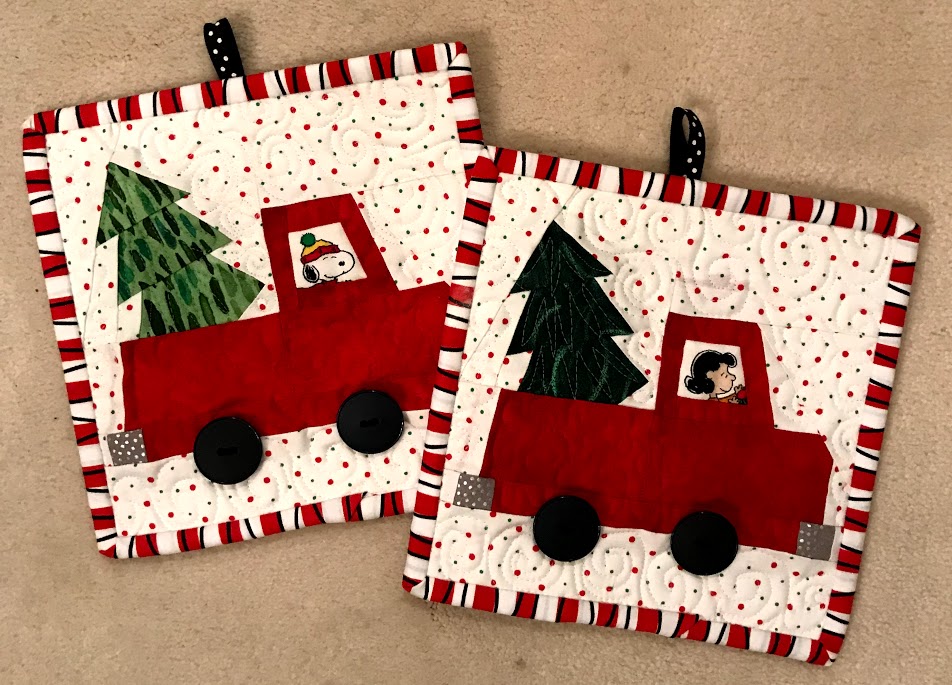
What could be cuter than the Little Red Truck? Especially with a fun novelty character in the driver’s seat.
The Little Red Truck
This paper pieced block measures 8″x 8″ unfinished and is super easy. Find a cute novelty fabric in your stash to use for an interesting little driver, or leave the window blank. I love using buttons for the wheels…it makes the paper piecing so much easier!
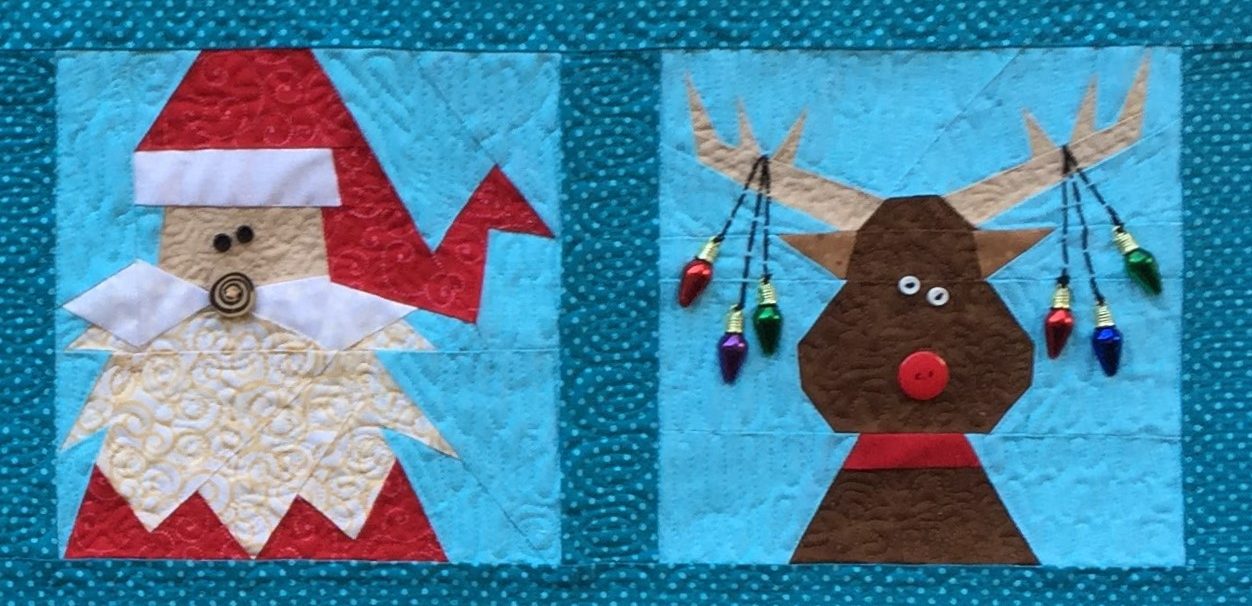
You know…it’s right around the corner…CHRISTMAS! And, I have lots of cute holiday designs to show you. This is my HO, HO, HO HOLIDAY COLLECTION, all paper pieced patterns.
Ho, Ho, Ho, Santa. He’s a jolly old soul, with a cute red button nose.
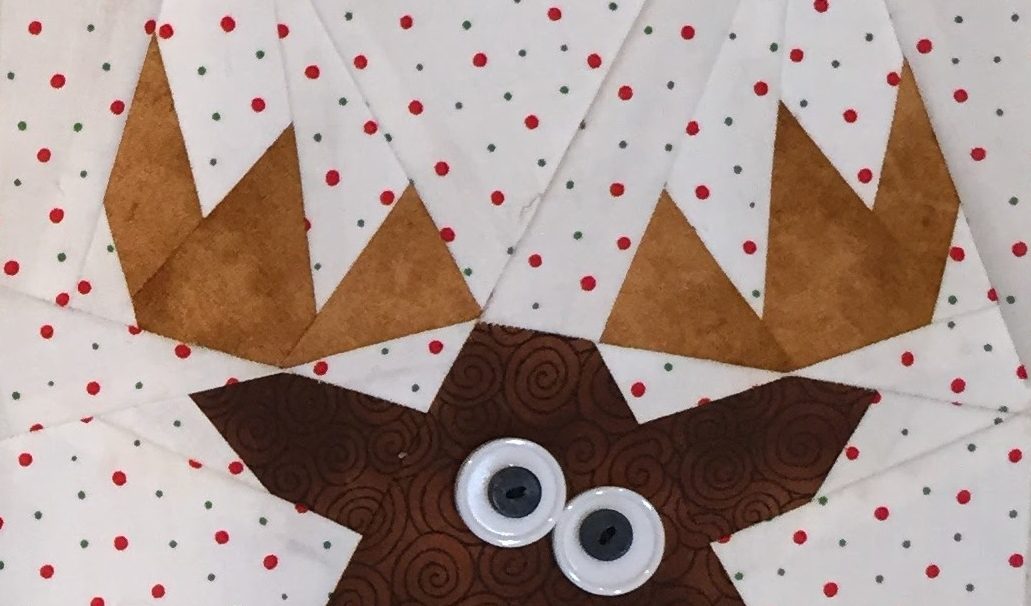
Ho, Ho, Ho Rudolph. I love how Rudolph’s antlers are teeter tottering on top of his head!
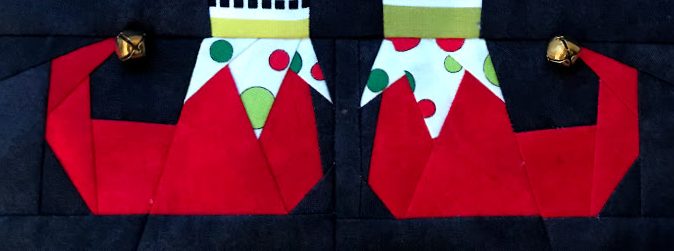
Ho, Ho, Ho Elf. This clever fellow is ready for some Christmas action. These blocks all fit into my pillow, potholder, and table runner patterns, as well as into any patterns from my books.
All blocks finish at 7 1/2″x 7 1/2″ square. All patterns can be found on my Etsy or Craftsy shops.
With Thanksgiving right around the corner, I’m getting out my meager amount of Turkey Day decorations. For some reason, I don’t have nearly as many November goodies in my stash as I have for Halloween and Christmas.
This googly eyed TURKEY is a fun block to add to a pillow or potholder.
If you are looking for a cute and quick project for Christmas, I just finished this ELFY SHOE block pattern.
One of my sweet customers requested a block that would be similar to my WITCHY PILLOW . Remember, I try to keep all of my blocks the same size, so any block pattern fits into any pattern.You always give me the best ideas!
Congratulations to Nancy, the winner of my Cat’s Meow Quilt pattern. Thanks so much for everyone who participated in the Pick A Pumpkin Blog Hop last week. I loved all the comments, and wish I could have replied to all of them. Thanks so much for all the love you shared!
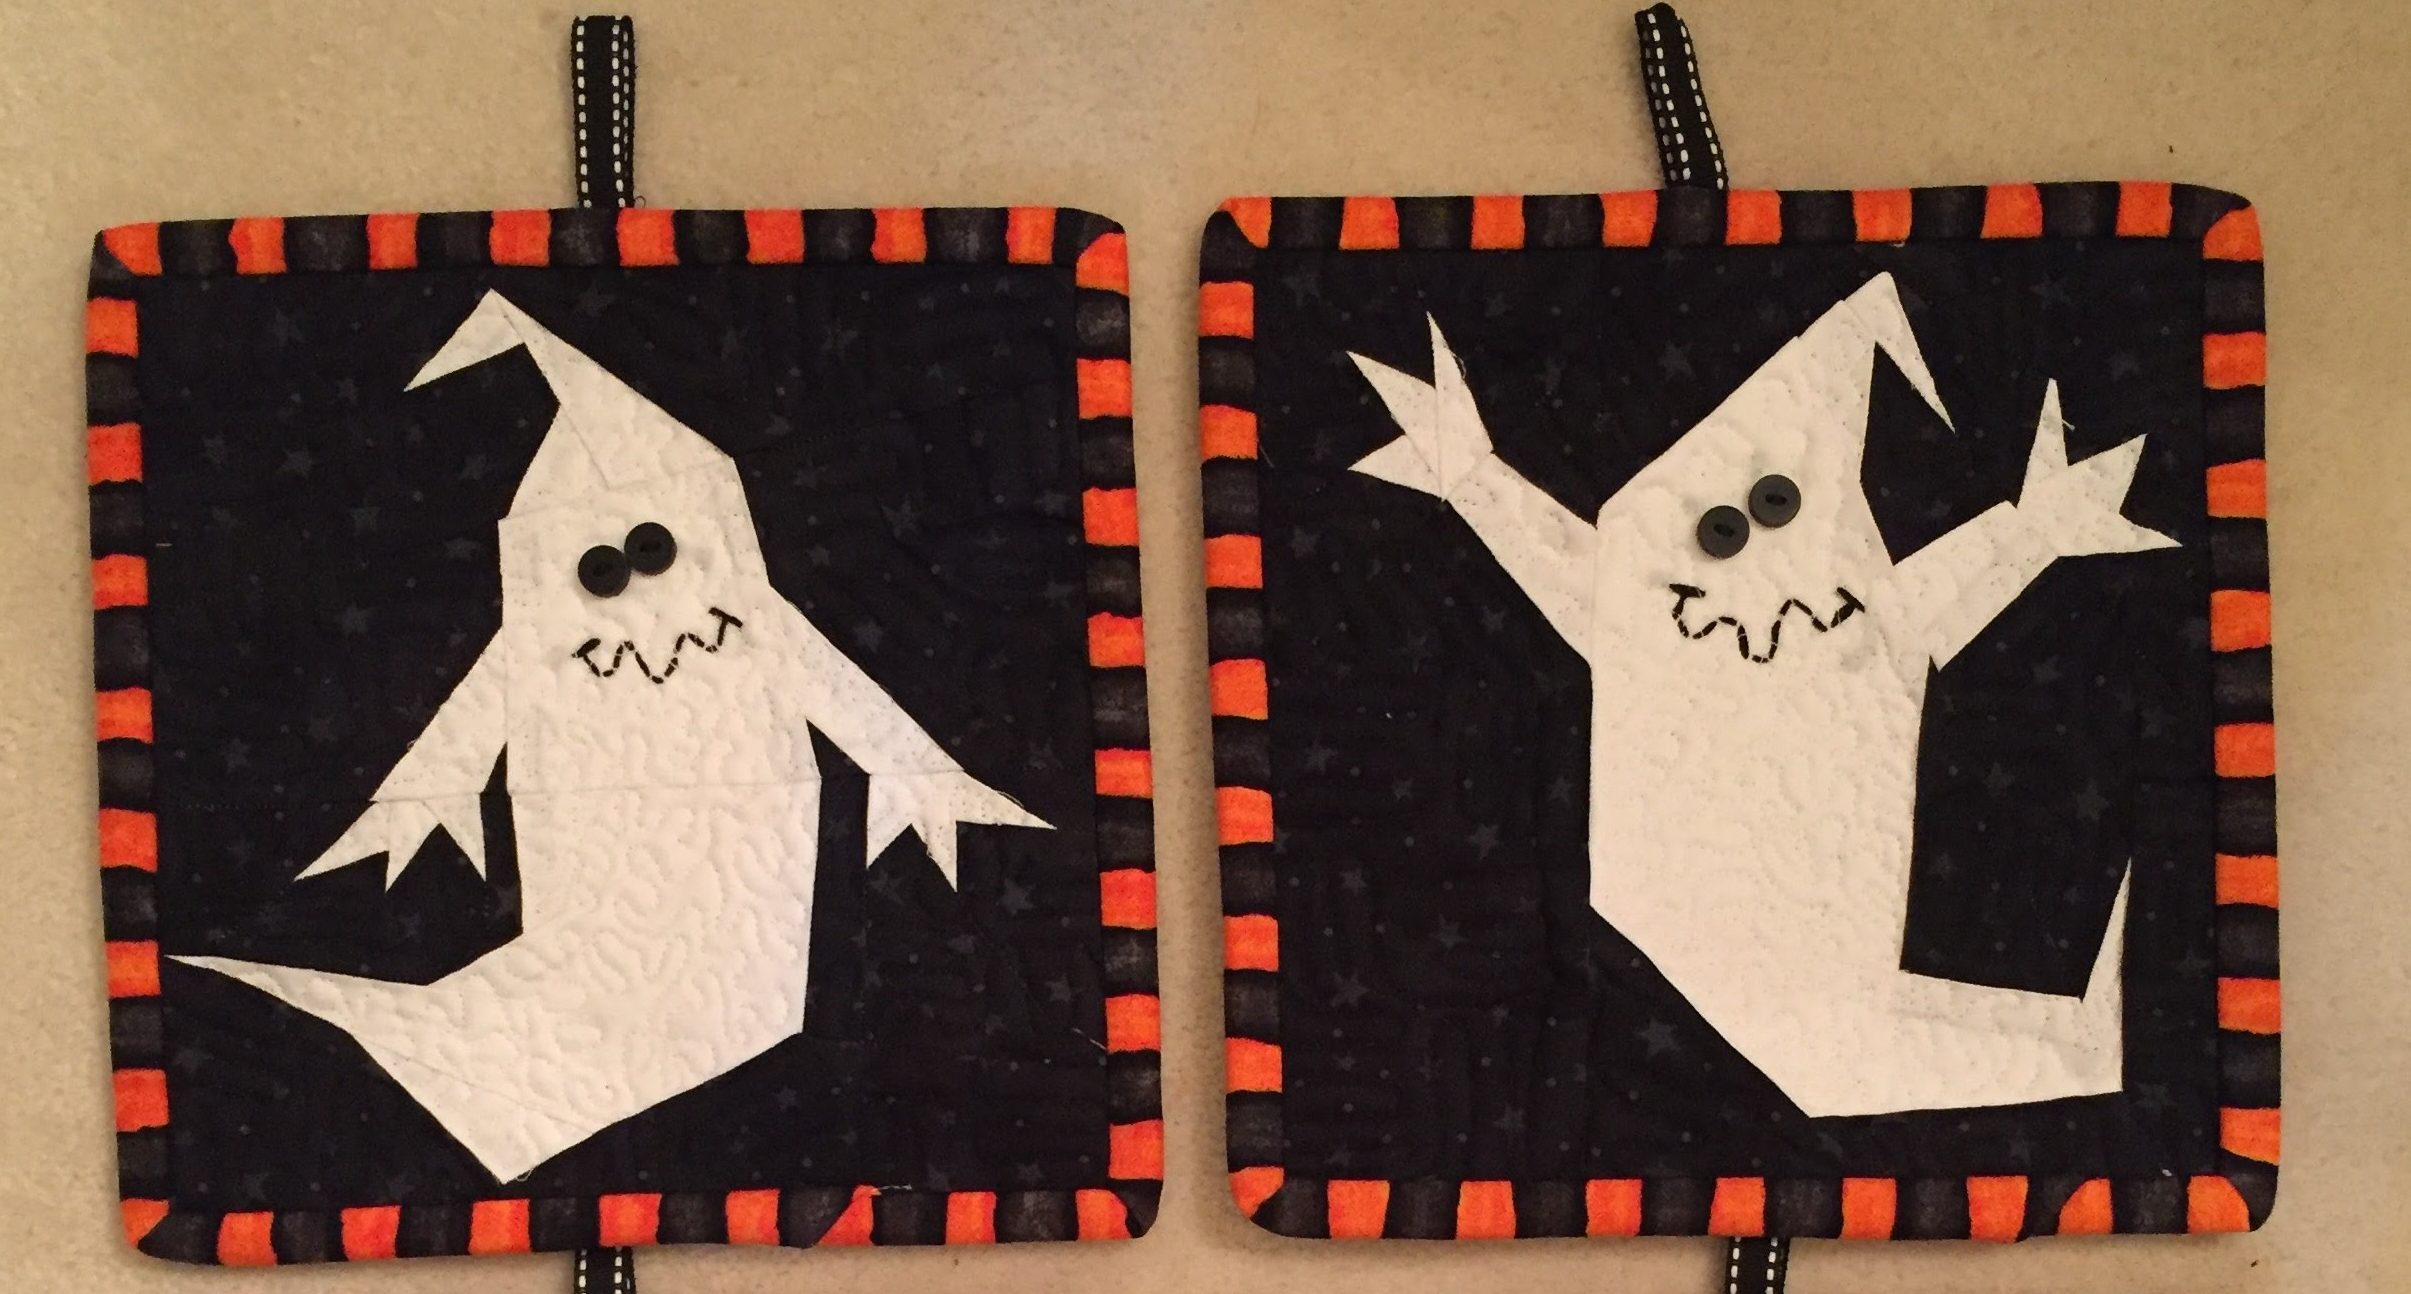
Halloween is just around the corner. If you want to get a jump on some cute seasonal projects, you might enjoy these ideas.
WITCHY PILLOW consists of an 8″x 8″ paper pieced block made into a 17″x 17″ pillow.
If you happen to live in the Utah area, my friend Eva is offering a PAPER PIECING PILLOW CLASS using this pattern. She used the new Halloween fabric line from Studio Fabric, “Me and My Ghoul Friends”. Isn’t it adorable?
So, I hope this motivates you to get started on some sweet Halloween projects! Please remember that when you print a PDF pattern, always select Custom Scale: 100% on your home printer.
You can find more of my Halloween paper piece patterns on Craftsy and Etsy.
I love designing paper piece patterns for the holidays. I am sharing a tutorial on paper piecing today using one of my new Christmas patterns. “Must Be Santa” can be made into a table runner or pillow if you follow the directions in the pattern. However, you can use the four 7 1/2″x 7 1/2″ blocks in this pattern for any number of projects.
This table runner is made using the four blocks in the pattern, Elf, Mrs. Claus, Santa Claus, and Rudolph. The pillow below is also included in the pattern.
For my tutorial, I will be using this Santa block, but any block in the pattern may be substituted.
I have designed many Santa blocks. This 1 is my favorite. I pride myself in offering very EASY patterns with just a few pieces. This particular block is NOT one of my easy blocks. It has a number of different sections that must be paper pieced separately, then sewn together to complete the block. Don’t let this deter you from trying paper piecing if you are a beginner. Each segment is fairly simple. So…let’s take this 1 step at a time…
Start by setting your stitch length to 1.5; that’s about 20 stitches per inch. Shortening the stitch length perforates the paper so as to make it easier to rip away the paper pattern when you are finished with the block.
Make 4 copies of the original pattern and cut around each segment (outlined in red lines) adding a 1/4″ seam allowance around each segment. Cut segments A/F from copy 1, segments B/E/I from copy 2, segments C/D/G from copy 3, and segment H from copy 4. Above you can see segments A, B, and C with the 1/4″ seam allowance around each piece. Now you are ready to start piecing!
Let’s start with segment A. Pin piece #1 to the appropriate fabric (background color), wrong sides together. There should be at least 1/2″ of excess fabric all the way around piece #1. You can check this by holding your pattern up to a light source.
Trim the excess fabric. Double check: The WRONG SIDE of the fabric should be facing the back of the pattern. This scrap is a 1/2″ larger than piece #1.
Find the stitching line between piece #1 and piece #2.
Use a bookmark or any piece of card stock to fold back piece #2 along this stitching line. It’s a bit hard to see because the bookmark and the back of the pattern are both white, but look closely to see how the pattern is folded.
The Add-A-Quarter ruler is very handy for trimming seam allowances.
Use an “Add-A-Quarter” ruler to trim away the excess fabric, trimming 1/4″ away from the stitching line (fold).
Piece #2 is skin color, so I am using a tea dye fabric. This scrap is a good 1/2″ larger all the way around than piece #2.
Place the pattern on top of the skin colored fabric scrap so the trimmed edges (seam allowances) line up.
Flip the pattern piece back down and pin in place. Sew on the seam line between pieces #1 and #2, starting and stopping your stitching 1/4″ before and after the seam line. There is no need to back tack, as each seam line will eventually be covered by another seam line.
Flip the fabric behind piece #2 and press in place. I also like to pin it flat so there is no movement as you add the next piece.
Looking at the pattern from the front, trim away any excess fabric from piece #2, but be GENEROUS with your seam allowance. I always allow for 1/2″ seam allowance; later to be trimmed to 1/4″. Piece #1 and #2 are now in place. Everything to complete segment A is now repeating these same steps.
Using the bookmark, fold the pattern back on the seam line between piece #2 and piece #3. Do you see that small 1/4″ seam projecting into piece #3…just to the right of my finger?
That little seam needs to be ripped open so the pattern will lay flat when folded back onto the bookmark.
Use the 1/4″ ruler to trim the seam allowance. Use a scrap of white for piece #3.
You can see I am using a sparkly white fabric. Piece #3 is part of Santa’s mustache. Line up the outer edge of the seam allowances, right sides together.
Flip the pattern open and pin in place.
Sew on the line between piece #2 and #3, again start and end 1/4″ before and after the seam line.
Flip the fabric behind piece #3, press, and pin in place.
Trim away the excess scrap of white, leaving a generous 1/2″ around the edges of piece #3.
By using larger scraps and trimming AFTER sewing, you will not have to guess what size to cut your scraps to fit each piece.
Continue in this manner until segment A and B are completed.
Trim the seam allowances that are between segment A and B to 1/4″.
These are the 2 edges that are now trimmed and ready to be pinned together and sewn.
Use a straight pin to poke into and line up the edge of the red seam line on segment A and the corresponding spot on segment B.
Pin the 2 segments together.
Sew on 1/4″ before and after the seam line. Rip away the paper in the seam allowance area on both segments. Open the segments flat and press, pressing both seams to one side or the other, depending on which way they want to lay.
And now for the Give-Away! I will be giving away a free copy of my “Sew Yourself A Merry Little Christmas” book. This book is filled with adorable holiday paper pieced block patterns and 8 different patterns that use the blocks.
These are just a few of the 16 paper pieced blocks in this book.
Due to the extremely high cost of postage overseas, I am only able to mail this book to a customer from the US. If someone wins from a foreign country, I will download this Christmas pattern to them, instead of the book: Must Be Santa Table Runner/Pillow pattern.
For a chance to win the free book (or pattern if you live overseas), leave a COMMENT on this post. Please make sure your email is included. The winner will be announced on Thursday, July 26.
Please visit other participating designers and quilters:
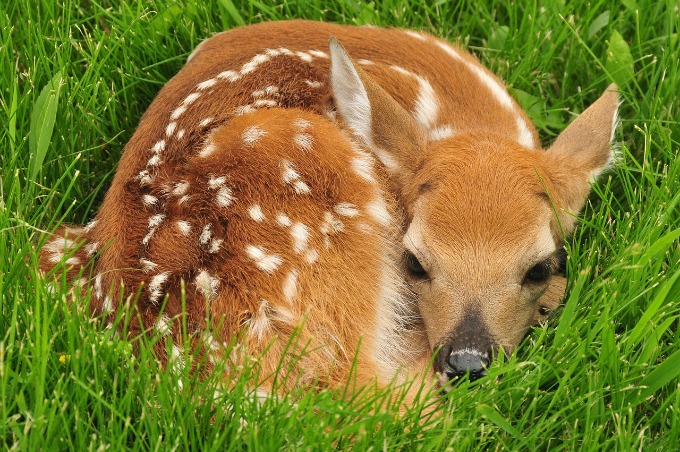
Often, my customers like to substitute different animal blocks in my patterns to get a more unique quilt. Here are 2 new paper pieced blocks that would work well in my Forest Friends quilt pattern.
This friendly Brown Bear is an 8″x 8″ unfinished block. Most of my paper pieced blocks are this size and can be mixed and matched into any of my patterns.
This Fawn would make a cute addition as well. I designed the fawn after finding a newborn fawn curled under a tree in my yard at the cabin. It was resting there for the day, and was later reunited with it’s mother.
So adorable! It laid in this position all day, never moving. Mother deer came in the night to gather her offspring and move on.
It’s always fun to be creative and make your own composition using the animals of your choice. Are there any other woodland animals that you would like to see in this quilt?
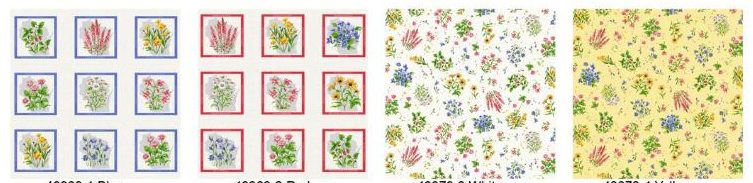
Believe it or not, once in a while I design a pattern that has no paper piecing. This tote is one of those patterns. Besides designing patterns, I also work part-time in a local quilt shop. Every year I design a tote pattern that works well with the Wisconsin Shop Hop fabrics. Lots of states offer a yearly shop hop featuring fabric about their state.
The Wisconsin 2018 fabric includes a panel fabric with 6″x 6″ square floral panels (the fabric pictured in the top left corner). I used the panels for the outer pockets.
The Plenty Of Posies Tote features 6 outer pockets and 2 inner pockets. It measures 14″ high, 16″ wide, and 4″ deep. This is a nice generous tote bag size! It is great for going to the market, using for a project bag (sewing or knitting), a beach tote, or an airplane tote(large enough for a lap top).
Here’s a closeup of one of the outer pockets. Each floral panel is a different Wisconsin state flower. This panel fabric could easily be substituted with any floral fabric, but if you want this exact fabric, you can call the shop where I work to order, beginning June 8: Quilt Essentials at (920)230-3680.
The pattern is designed for an easy/intermediate sewing level. It is a great pattern to learn how to sew a tote with a boxed bottom.
Once again, my sweet customers have steered me in a fun direction. “Unicorns” keep popping up in conversations and so many people want them for pillows and quilts.
Here is my Unicorn Block that measures 8″x 8″ square and is perfect for a pillow, as pictured below.
I love the 1 block version because its fast, but I also wanted a full body unicorn.
This Large Unicorn is constructed with 6 blocks and measures 15″ wide x 22.5″ high. My intention is to use this unit in the center of a quilt and add some borders. I haven’t gotten around to doing a complete quilt pattern yet, but I can envision some paper pieced butterflies as cornerstones. How would you complete this unicorn into a quilt?
“Watercolor” by Moda inspired me to make the unicorn mane very colorful. This is a lovely fabric line and comes in scrumptious colors.
For the horn, I stitched some stripes with silver metallic embroidery floss, but a fun striped fabric could work, too.
I also want to share a photo from Edith of a cute tote she designed using my Easter Bunny 2 Block.
She did a great job! Keep your photos coming. It inspires me to see what you are doing with my patterns.
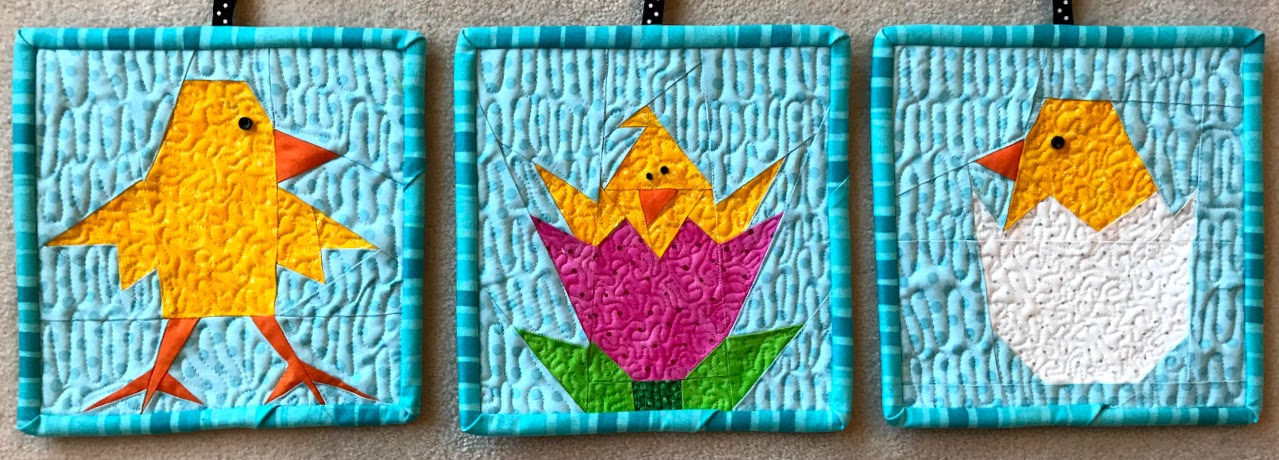
Easter is just around the corner. Per my friend Marilyn’s advice…I have been designing lots of Easter blocks.
My Easter blocks measure 8″x 8″ unfinished and can be used in table runners, potholders, gift sacks, pillows, or even quilts. This photo was shared from Marilyn who used my patterns to teach a class on paper piecing.
The bunny and chick blocks can be purchased as a total pattern: Easter Table Runnerand Potholders. Some of these blocks are also available for single block purchase.My Happy Easter Bunny and Happy Easter Ducky are another popular set of Easter blocks. Find a really cute fabric to use for the egg, and you are all set!
Isn’t this table runner adorable? Lisa England used my Happy Easter Bunny pattern and made the cutest Easter runner ever!
If you are into Easter Bonnets, this is the block for you.
And here’s a block to make your mouth water…Chocolate Bunny.
Here’s a real simple block, Easter Egg. Find a cute striped fabric to make this super easy pattern.