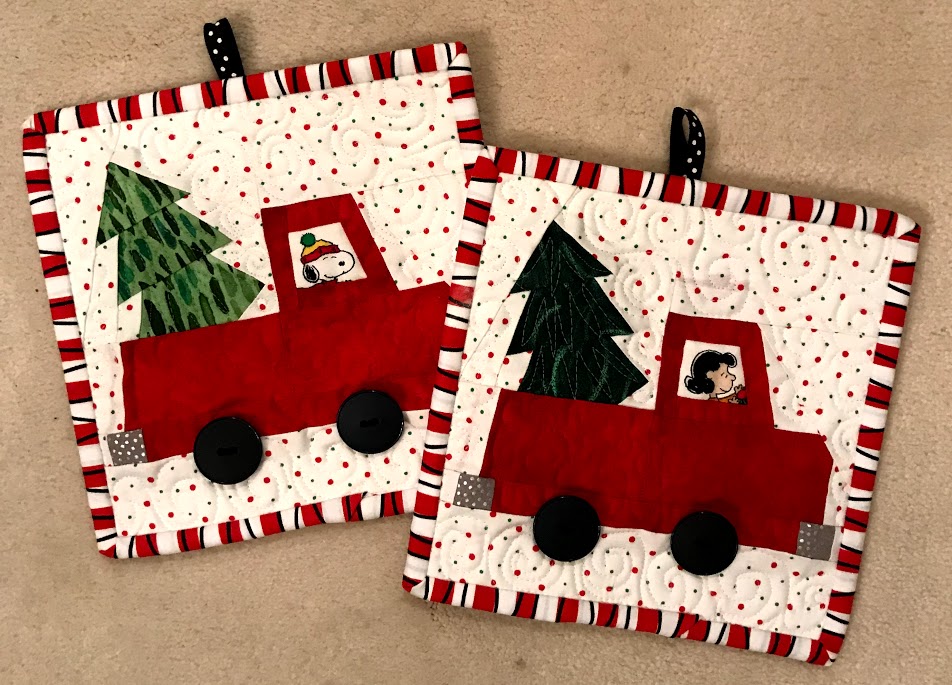
What could be cuter than the Little Red Truck? Especially with a fun novelty character in the driver’s seat.
The Little Red Truck
This paper pieced block measures 8″x 8″ unfinished and is super easy. Find a cute novelty fabric in your stash to use for an interesting little driver, or leave the window blank. I love using buttons for the wheels…it makes the paper piecing so much easier!
It is so much fun to share photos from my customers and friends. This week I am posting photos of projects created from my Sew Yourself A Merry Little Christmas book.
These 16 adorable placemats were sewn by Donna Smith. She made a placemat for every student in her daughter’s third grade class, using all 16 of the paper piece block patterns from my book. I would love to see the students’ faces when they each get their own special placemat…what a sweet friend they have in Donna.
This cute Snowman Door Knob Pillow was created by Judith Johnson. I love her fabric choices!
This book has 16 super cute paper pieced holiday images. All blocks measure 8″ x 8″ unfinished, so they can be mixed and matched to fit into any of my patterns.
There are patterns in the book for potholders, table runners, stockings, placemats…
gift sacks, and tree skirts.
Thanks to Donna and Judith for sharing photos. I would love to see what YOU will create! Email photos to: maryannhertel@gmail.com
Welcome to the “Christmas In July” Blog Hop. I am offering a FREE tutorial on paper piecing AND a Give-Away at the end of this post.
Thank you to Carol Swift from Just Let Me Quilt for hosting this blog hop. She has worked countless hours to organize this hop. Thank you, Carol!
I am offering a FREE TUTORIAL on 3 tasks…1) How to paper piece a simple block using my Snowman block from my Sew Yourself A Merry Little Christmas book, 2) How to paper piece a combination block, and 3) How to assemble the Gift Sack pattern in my book.
Paper piecing is simply a “sew by number” technique. You work from a paper pattern, sewing right through the paper and fabric to create the image. It is my FAVORITE way to add an image to a project.
So first, let’s take a look at sewing the simple block. I am including a download of every step in the paper piecing process to complete this Snowman. Click
Workshop-Step-by-Step.pptx (1314 downloads )
to download the free tutorial.
Also included in the tutorial are 2) How to paper piece a combination block, Polar Bear block.
AND a tutorial on 3) How to assemble the Gift Sack pattern. All of these patterns are found in my Sew Yourself A Merry Little Christmas book. Available on Made By Marney on Etsy. Also available on Amazon.
One lucky visitor will win a FREE Sew Yourself A Merry Little Christmas book. To enter the raffle, leave a comment on this post. Make sure your email is included in the comment. Due to the extremely high cost of postage overseas, I am only able to mail this book to a customer from the US. If someone wins from a foreign country, I will download this Christmas pattern to them, instead of the book: Must Be Santa Table Runner/Pillow pattern. Winner will be announced Saturday, July 28.
Please visit all of the wonderful designers and quilters participating in this blog hop:
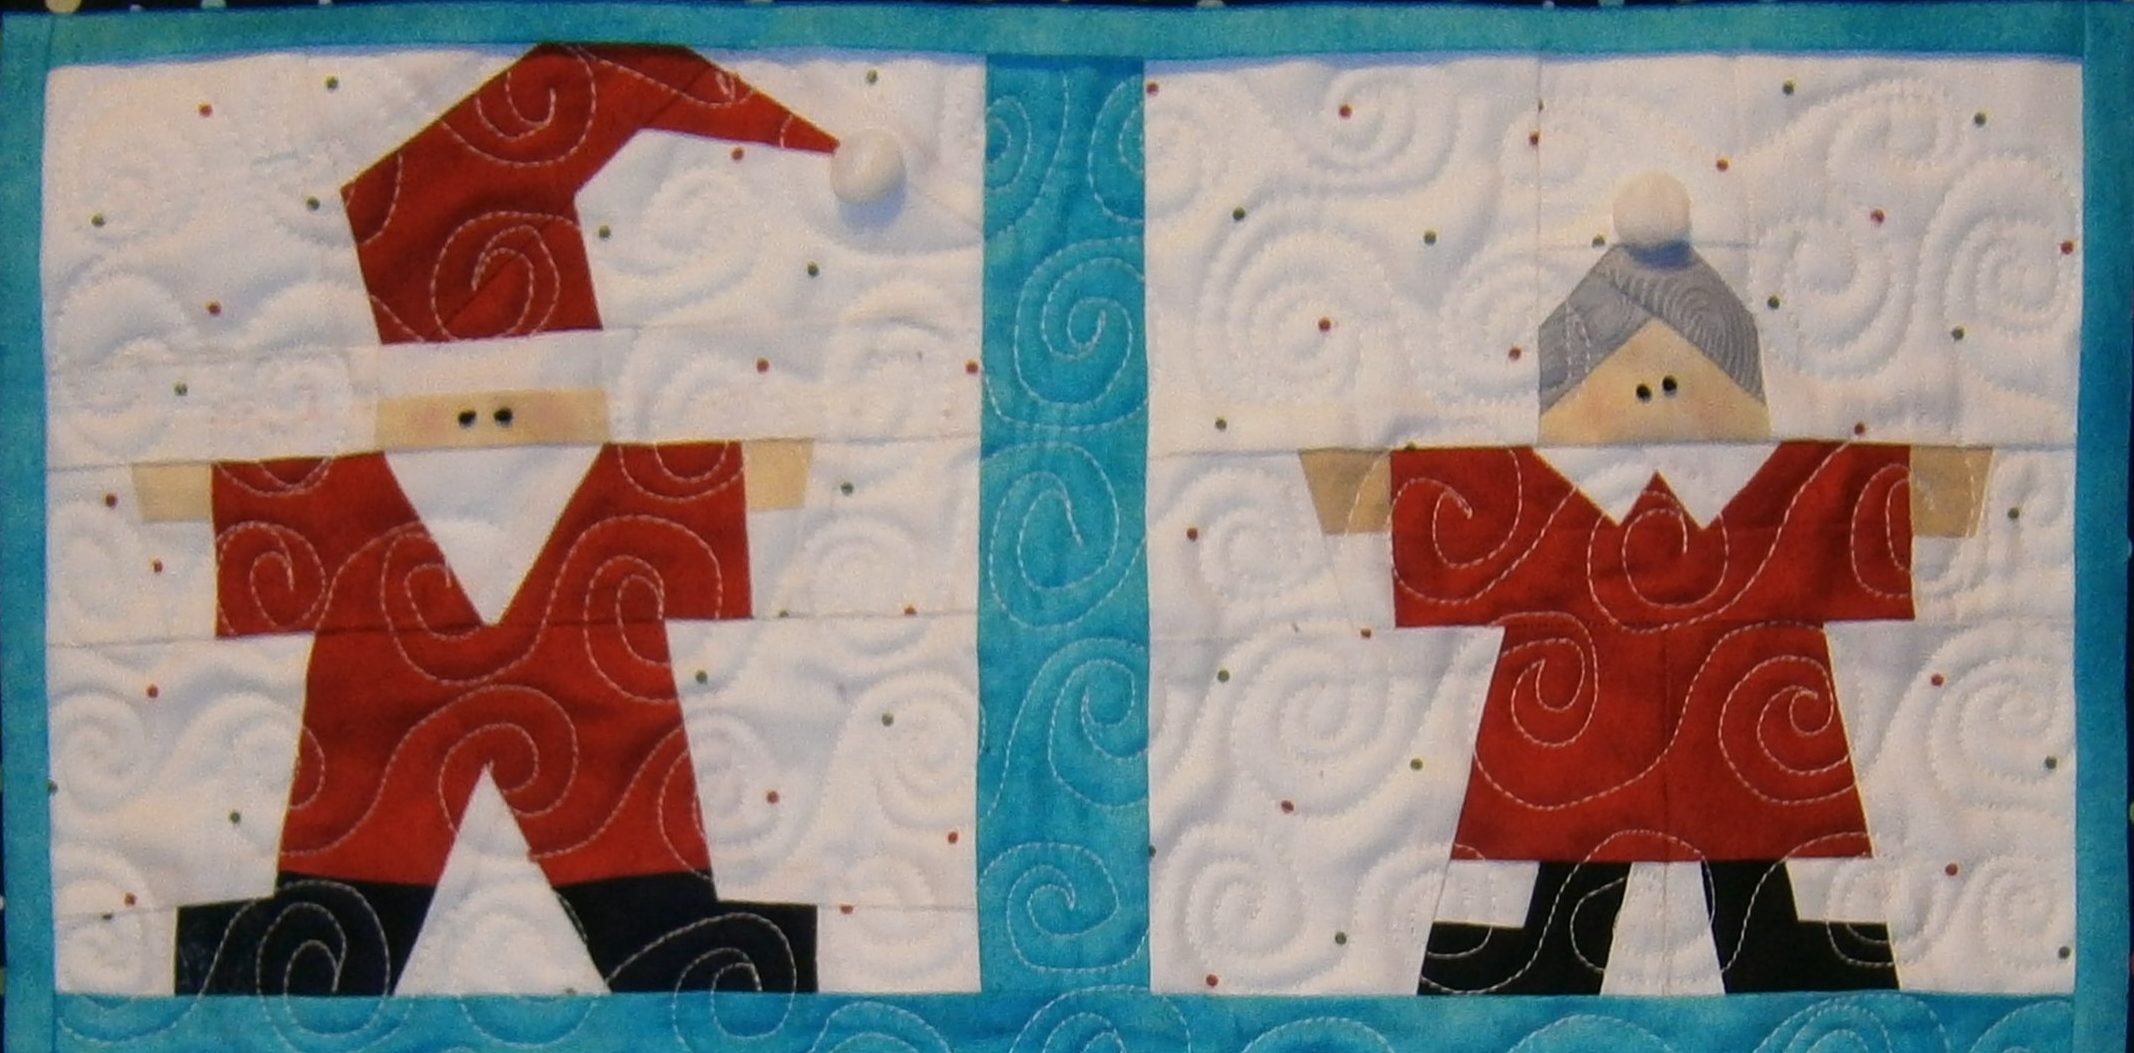
I love designing paper piece patterns for the holidays. I am sharing a tutorial on paper piecing today using one of my new Christmas patterns. “Must Be Santa” can be made into a table runner or pillow if you follow the directions in the pattern. However, you can use the four 7 1/2″x 7 1/2″ blocks in this pattern for any number of projects.
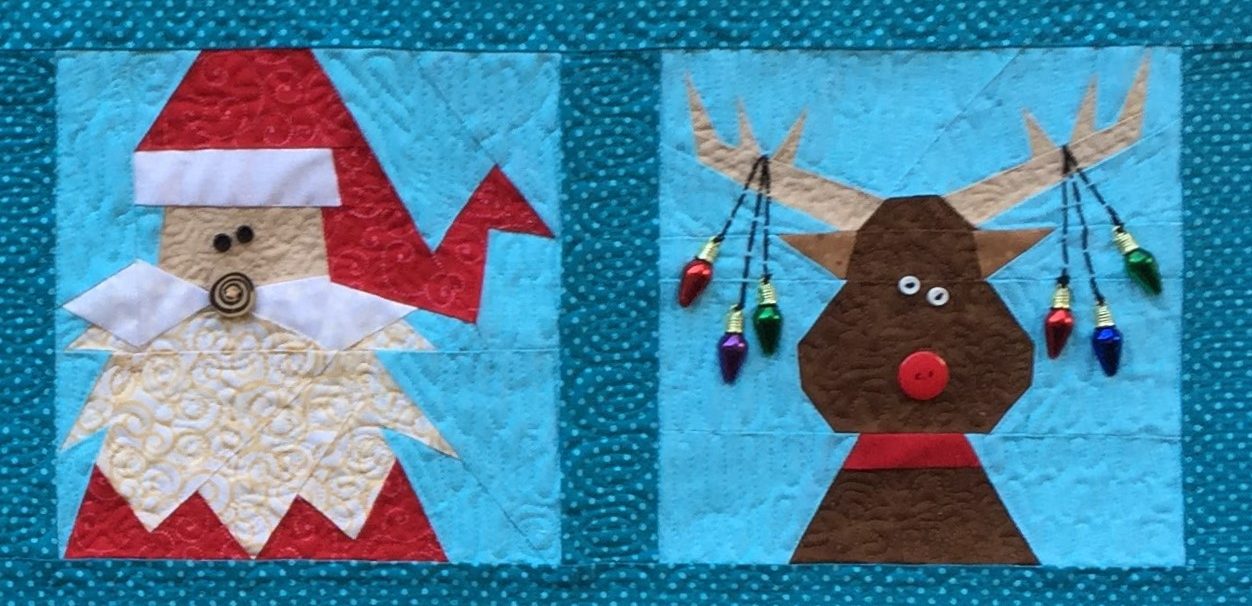
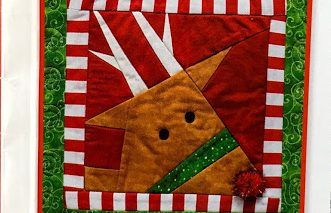
This table runner is made using the four blocks in the pattern, Elf, Mrs. Claus, Santa Claus, and Rudolph. The pillow below is also included in the pattern.
For my tutorial, I will be using this Santa block, but any block in the pattern may be substituted.
I have designed many Santa blocks. This 1 is my favorite. I pride myself in offering very EASY patterns with just a few pieces. This particular block is NOT one of my easy blocks. It has a number of different sections that must be paper pieced separately, then sewn together to complete the block. Don’t let this deter you from trying paper piecing if you are a beginner. Each segment is fairly simple. So…let’s take this 1 step at a time…
Start by setting your stitch length to 1.5; that’s about 20 stitches per inch. Shortening the stitch length perforates the paper so as to make it easier to rip away the paper pattern when you are finished with the block.
Make 4 copies of the original pattern and cut around each segment (outlined in red lines) adding a 1/4″ seam allowance around each segment. Cut segments A/F from copy 1, segments B/E/I from copy 2, segments C/D/G from copy 3, and segment H from copy 4. Above you can see segments A, B, and C with the 1/4″ seam allowance around each piece. Now you are ready to start piecing!
Let’s start with segment A. Pin piece #1 to the appropriate fabric (background color), wrong sides together. There should be at least 1/2″ of excess fabric all the way around piece #1. You can check this by holding your pattern up to a light source.
Trim the excess fabric. Double check: The WRONG SIDE of the fabric should be facing the back of the pattern. This scrap is a 1/2″ larger than piece #1.
Find the stitching line between piece #1 and piece #2.
Use a bookmark or any piece of card stock to fold back piece #2 along this stitching line. It’s a bit hard to see because the bookmark and the back of the pattern are both white, but look closely to see how the pattern is folded.
The Add-A-Quarter ruler is very handy for trimming seam allowances.
Use an “Add-A-Quarter” ruler to trim away the excess fabric, trimming 1/4″ away from the stitching line (fold).
Piece #2 is skin color, so I am using a tea dye fabric. This scrap is a good 1/2″ larger all the way around than piece #2.
Place the pattern on top of the skin colored fabric scrap so the trimmed edges (seam allowances) line up.
Flip the pattern piece back down and pin in place. Sew on the seam line between pieces #1 and #2, starting and stopping your stitching 1/4″ before and after the seam line. There is no need to back tack, as each seam line will eventually be covered by another seam line.
Flip the fabric behind piece #2 and press in place. I also like to pin it flat so there is no movement as you add the next piece.
Looking at the pattern from the front, trim away any excess fabric from piece #2, but be GENEROUS with your seam allowance. I always allow for 1/2″ seam allowance; later to be trimmed to 1/4″. Piece #1 and #2 are now in place. Everything to complete segment A is now repeating these same steps.
Using the bookmark, fold the pattern back on the seam line between piece #2 and piece #3. Do you see that small 1/4″ seam projecting into piece #3…just to the right of my finger?
That little seam needs to be ripped open so the pattern will lay flat when folded back onto the bookmark.
Use the 1/4″ ruler to trim the seam allowance. Use a scrap of white for piece #3.
You can see I am using a sparkly white fabric. Piece #3 is part of Santa’s mustache. Line up the outer edge of the seam allowances, right sides together.
Flip the pattern open and pin in place.
Sew on the line between piece #2 and #3, again start and end 1/4″ before and after the seam line.
Flip the fabric behind piece #3, press, and pin in place.
Trim away the excess scrap of white, leaving a generous 1/2″ around the edges of piece #3.
By using larger scraps and trimming AFTER sewing, you will not have to guess what size to cut your scraps to fit each piece.
Continue in this manner until segment A and B are completed.
Trim the seam allowances that are between segment A and B to 1/4″.
These are the 2 edges that are now trimmed and ready to be pinned together and sewn.
Use a straight pin to poke into and line up the edge of the red seam line on segment A and the corresponding spot on segment B.
Pin the 2 segments together.
Sew on 1/4″ before and after the seam line. Rip away the paper in the seam allowance area on both segments. Open the segments flat and press, pressing both seams to one side or the other, depending on which way they want to lay.
And now for the Give-Away! I will be giving away a free copy of my “Sew Yourself A Merry Little Christmas” book. This book is filled with adorable holiday paper pieced block patterns and 8 different patterns that use the blocks.
These are just a few of the 16 paper pieced blocks in this book.
Due to the extremely high cost of postage overseas, I am only able to mail this book to a customer from the US. If someone wins from a foreign country, I will download this Christmas pattern to them, instead of the book: Must Be Santa Table Runner/Pillow pattern.
For a chance to win the free book (or pattern if you live overseas), leave a COMMENT on this post. Please make sure your email is included. The winner will be announced on Thursday, July 26.
Please visit other participating designers and quilters:
Watch for 12 Days of Christmas in July Blog Hop starting this Saturday, July 14. Many thanks to Sarah Craig at Confessions Of A Fabric Addict. She has spent countless hours organizing this fun filled event. Visit Sarah for the entire schedule on Saturday, July 14.
Christmas is my favorite holiday for designing. I have created many different paper pieced Santas, but on Tuesday I will be sharing a tutorial on how to paper piece my favorite Santa pattern. Visit each of these 29 designers between July 14-29.
Each designer is offering something fun and exciting for Christmas… perhaps a free tutorial or a pattern. AND…some of us will also be offering GIVE-AWAYS.
I will be giving away 1 free copy of my latest paper piecing book, Sew Yourself A Merry Little Christmas. This book offers 16 adorable paper pieced blocks AND 8 cute holiday projects to use the blocks.
This Polar Bear table topper and gift sack are both included in the book, along with so much more.
Join the fun! My day to post is Tuesday, July 17. I will be including a full schedule on Tuesday. See you then!
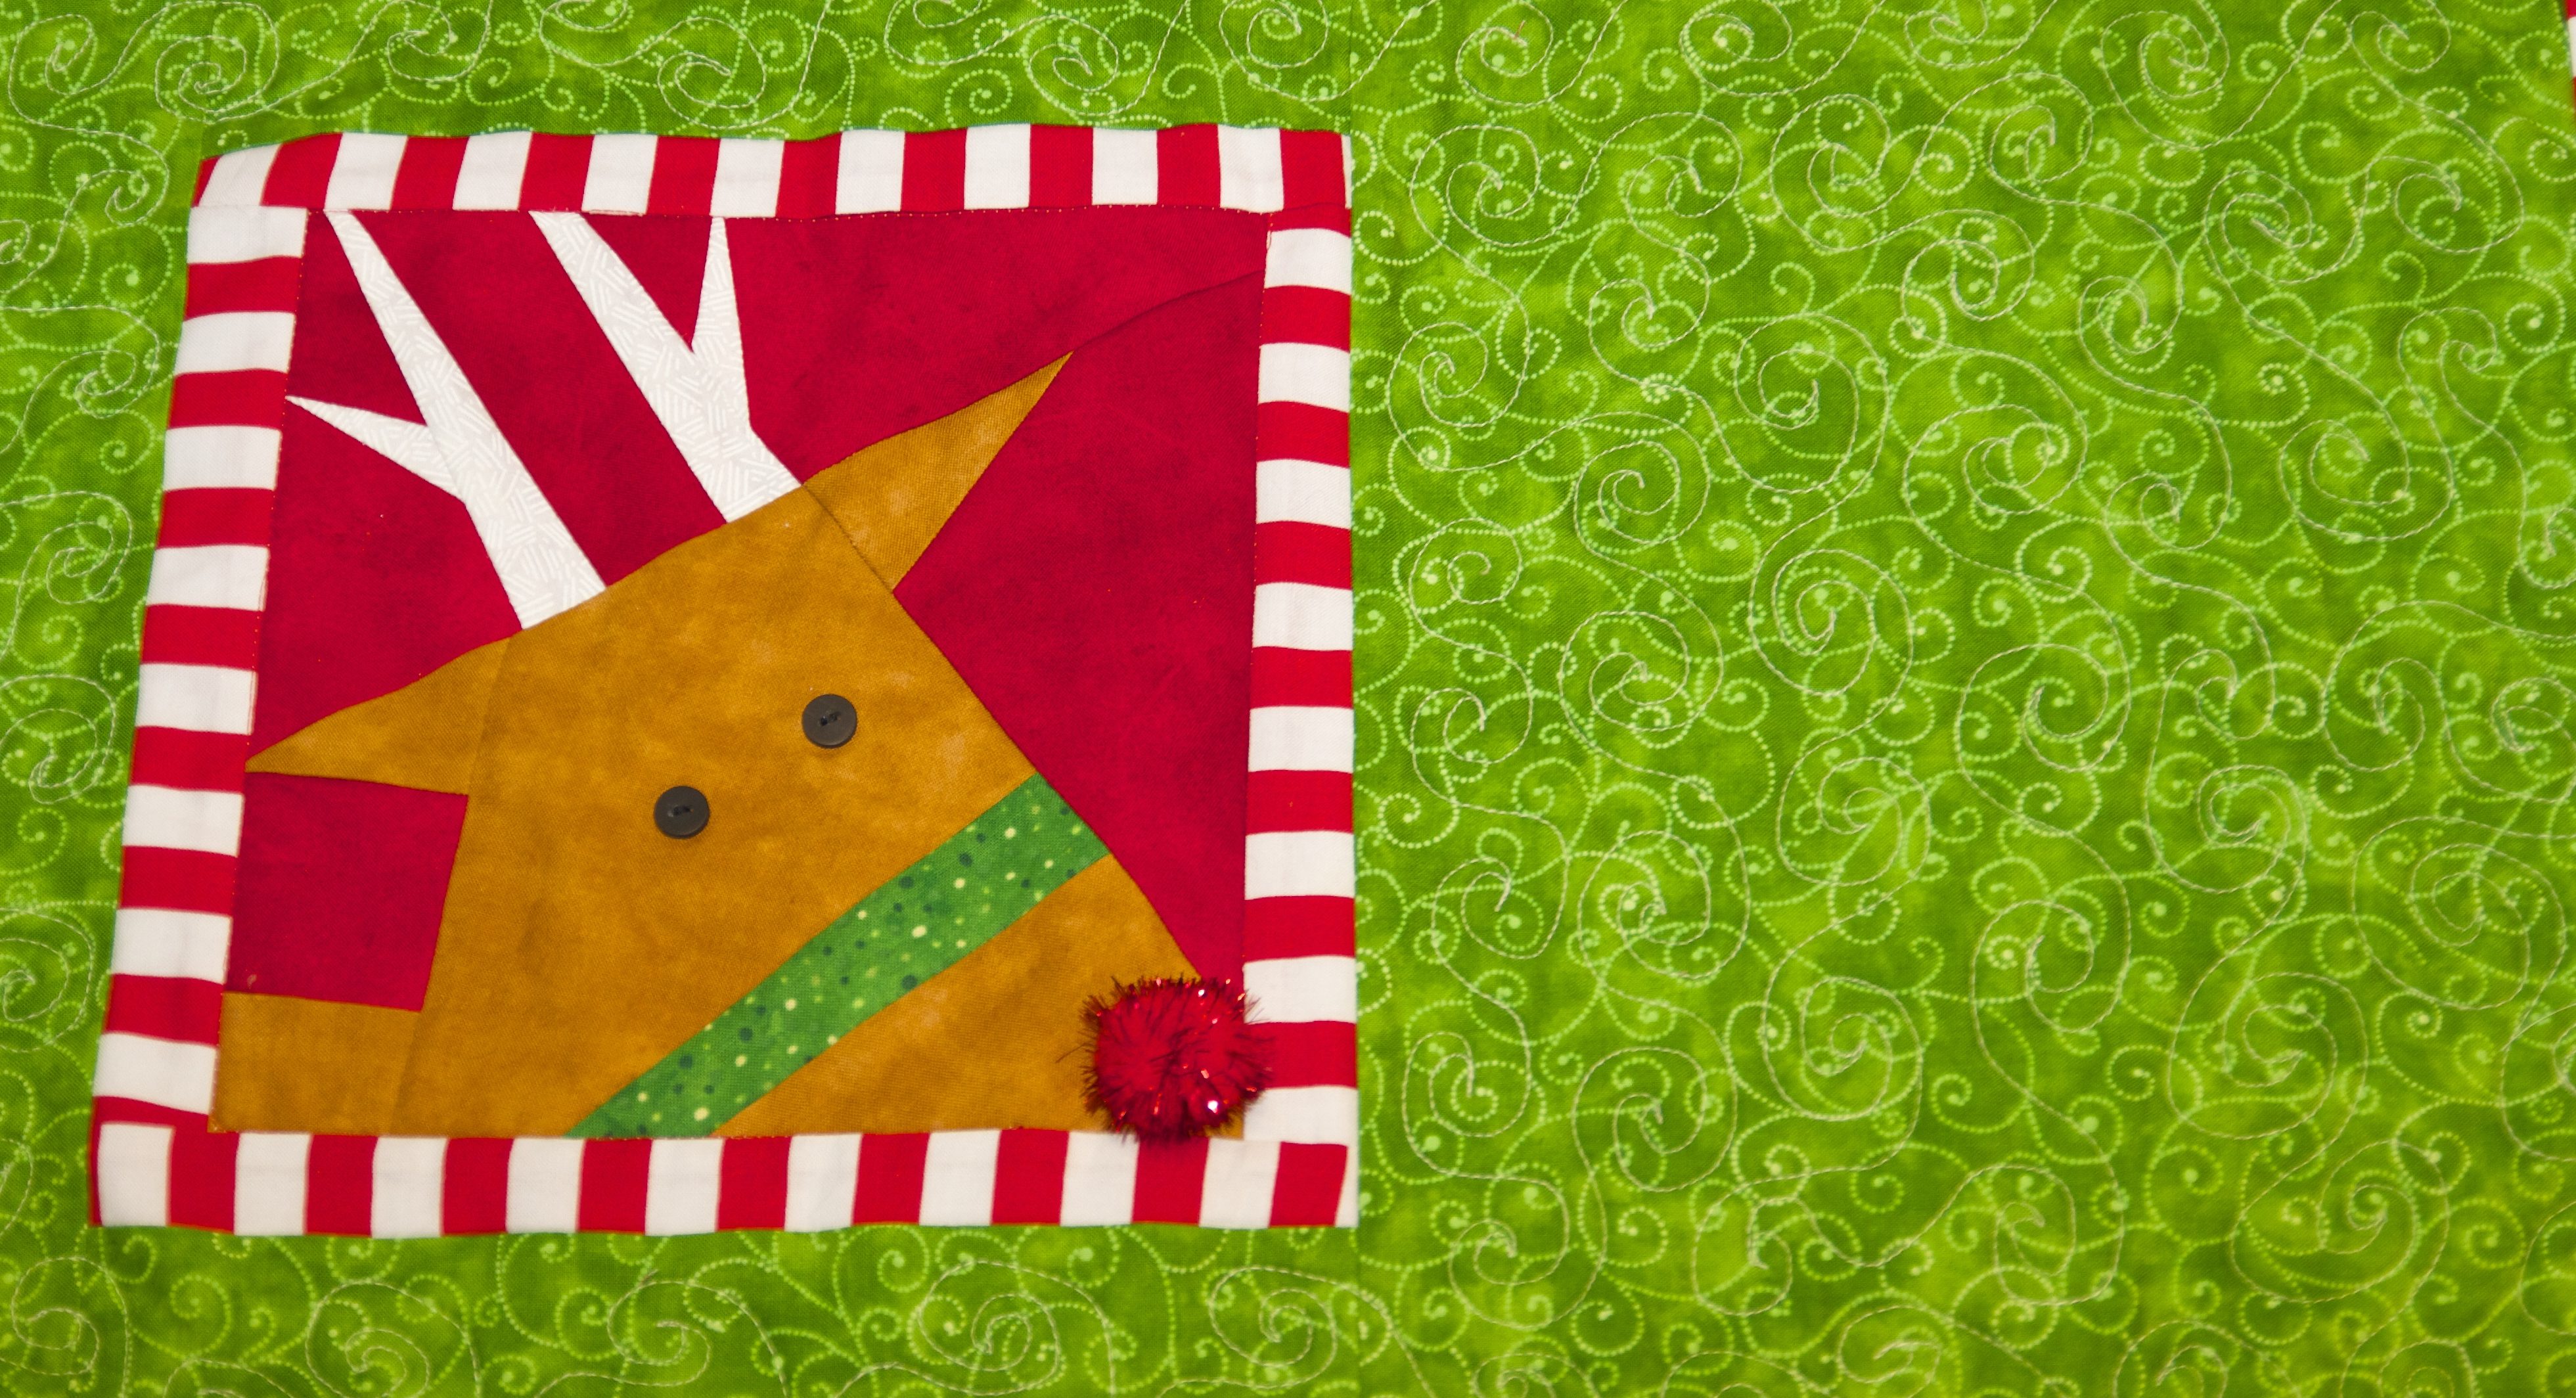
Hello to my friends everywhere! Today I am giving a special shout out to my friends and customers from Australia. I was fortunate enough to have my latest book, “Sew Yourself A Merry Little Christmas” previewed in their magazine, “Down Under Quilts“.
There I am on the cover…well it’s not really me, but my Rudolph.
The magazine shares a FREE pattern block “Present” from my book and the instructions to make it into a placemat.
I am very busy working on some cute designs for Valentines/Winter. There is an upcoming BLOG HOP that I want to share with you. In February, I will be participating in the “Put A Little Love In Your Heart” Blog Hop from February 5-8.
This is right around the corner. Everyday different quilters will be sharing a FREE pattern with a heart in it. This sounds like so much fun. I can’t wait! I will keep you posted as this fun event approaches. Some of the sights, including mine, will be offering give-aways, too.
I’ll let you know what my give-away will be next week! Stay tuned…
Hi everyone…thanks so much for stopping by. Here are my 5 favorite posts of 2017.
My Jolly Old St. Nick was one of my favorite patterns this year for beginners. This post was very popular with new and experienced paper piecers because it was easy, but cute!
I adore spending a weekend at my cabin. This loon block gives me a calm feeling of relaxation and reminds me of the lovely song of the loon that I hear when at the lake.
When my kids were little, they loved hearing nursery rhymes from the Richard Scarey book. This quilt reminds me of reading to my kids every nite before bedtime.
Merry Christmas to all of my blogging friends. Thank you for allowing me to share my creations with you. As a retiree, designing has given me a purpose in life.
As Christmas day draws near, I am decorating my home with all of this year’s new holiday projects. Turquoise, red, and green have become my favorite holiday colors.
I’m loving my polar bears, as they are something that I can keep in my decorating all through winter. I hate having to take down all the Christmas things right after the holidays. I am loving my goofy Snowman for the same reason.
I am packing up to vend at the Hudson Heritage Quilters Patchwork Harvest X Quilt Show this weekend, November 4 and 5. This will be my first time vending in Hudson. I have heard so many lovely things about this friendly community in Wisconsin.
If you are anywhere near Hudson this weekend…stop by and visit me at the River Crest Elementary School, 535 County Road F. I will be there Saturday and Sunday.
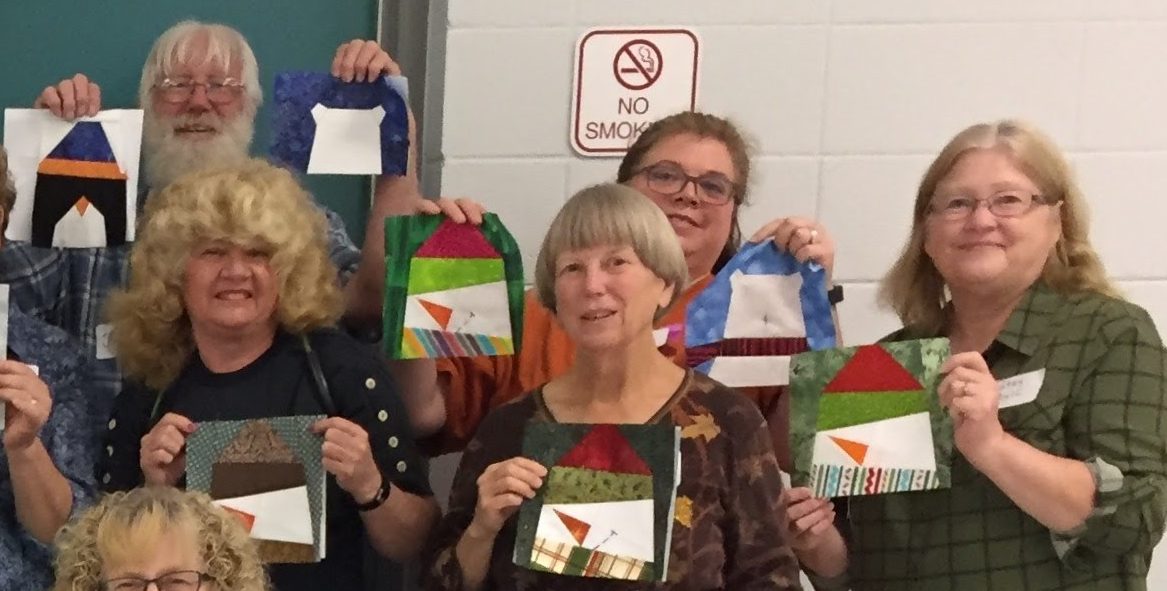
These friends from Wisconsin Rapids attended my Paper Piecing Workshop last Saturday. As you can see from their lovely smiles, we had so much fun! Attendees ranged from beginners to novice, but all enjoyed creating adorable Christmas blocks from my latest book, “Sew Yourself A Merry Little Christmas“.
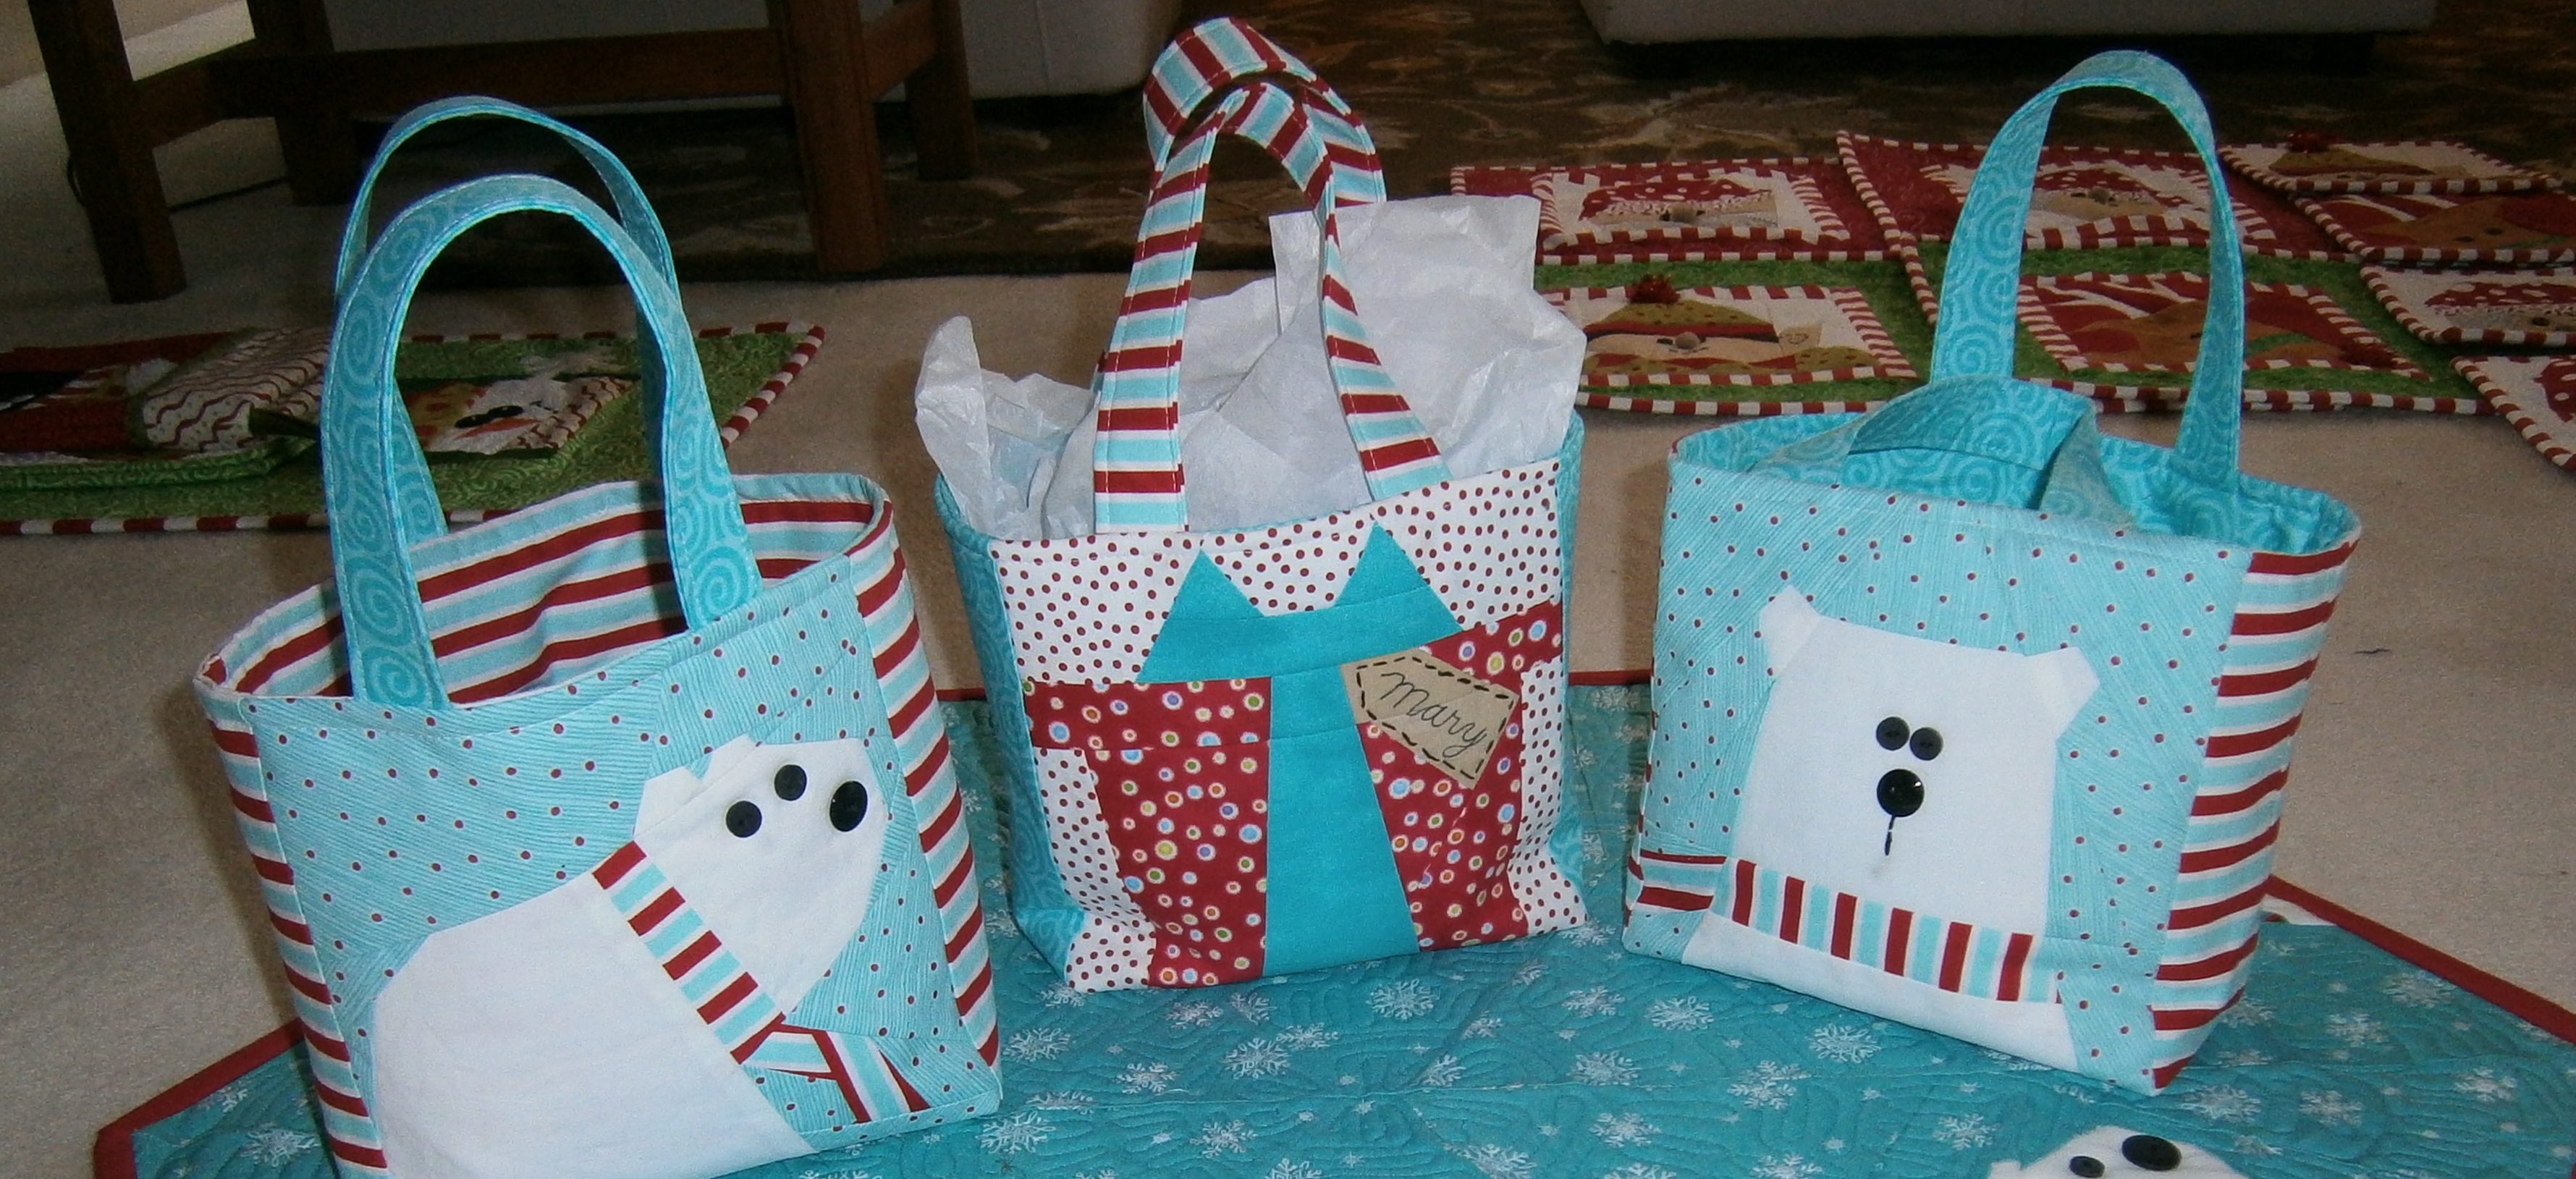
We also put together the “Gift Sack” pattern, using one of the blocks we had just created.
This is a small tote to be used for gifts or decorating.
Aren’t these Halloween Trick or Treat Sacks too cute? These were made by my customer, Marilyn. She used an assortment of my Halloween block patterns and the same Gift Sackpattern from my Christmas bookHere’s a close-up of two of the totes. Adorable!
Thanks to all my new friends in Wisconsin Rapids for hosting my workshop.
Visit me on Etsy and Craftsy to see more Made By Marney patterns and books.